
Currently Empty: $0.00


Introduction
The Blink LED project is the “Hello World” of Arduino. Just as a beginner programmer’s first task is to make a computer
print “Hello World,” in electronics the first step is making an LED blink.
This project helps you understand the three most important concepts in Arduino programming and electronics:
1. Digital Output – how a microcontroller pin can send a HIGH (5V) or LOW (0V) signal.
2. Timing Control – using the delay() function to pause the program.
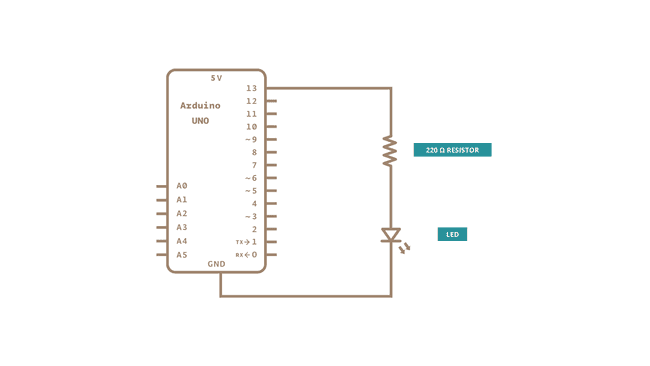
3. Circuit Control – connecting a simple circuit with a resistor and LED, and controlling it through code.
By completing this project, you will learn how hardware (the LED circuit) and software (the Arduino code) work
together. This forms the foundation for controlling sensors, motors, and other components in future projects.
Hardware Required
Arduino Uno (or compatible board)
• 1 × LED (any color, 5mm)
• 1 × 220Ω resistor (limits current, prevents LED damage)
• Breadboard
• Jumper wires
• USB cable (to connect Arduino to computer)
(Tip: If you don’t have these, you can use the onboard LED already connected to pin 13 on most Arduino boards.)
0/3